Showing posts with label Salad Recipes. Show all posts

Tuesday, March 11, 2008

"Inihaw Na Liempo & Ensaladang Talong" (Grilled Pork belly & Grilled Eggplant Salad)

Ingredients:

for the meat:
  • 2 slabs (500-600 grams) pork belly (liempo), each cut into three
  • salt and pepper
  • 2 cloves garlic, pounded & finely minced
  • 2 pcs kalamansi
  • liquid seasoning or light soy sauce

for the salad:
  • 2 large (about 400 grams) eggplant
  • 3 large (150 grams) semi-ripe red tomatoes
  • a tbsp of finely minced red onion
  • salt and pepper

for the dip:
  • kalamansi
  • soy sauce
  • hot chili pepper (labuyo)


Procedure:

Grill the eggplant or broil for 20 minutes at 475 fahrenheit, like I did. Cool. Peel off the skin. Chop into cubes. Put in a container. Coarsely chop the tomatoes, place where the eggplant is. Sprinkle the onion. Add salt and pepper to taste. Mix. Cover. Let it sit in the refrigerator until ready to serve.

Meanwhile, place the pork in a large bowl or tray. Sprinkle salt and pepper generously. Put the garlic evenly. Squeeze kalamansi on top, strain the seeds. Drizzle with liquid seasoning. Mix and mash thoroughly. Set aside.

Prepare the dip, squeeze kalamansi in a small bowl. Pour lightly with soy sauce. Add the hot chili pepper. Mash if you want it to be spicy.

Grill the pork until done. I grilled mine in a turbo broiler for 25-30 minutes at 350 fahrenheit. For easy eating, you can chop the pork before serving or serve it as it is.

Serve with lots of hot steaming white rice and the "ensaladang talong" that perfectly goes with it! (",)

Sunday, December 23, 2007

"Fruit Salad"


Ingredients:
  • 4 pcs coconut
  • 1 large can fruit cocktail
  • 1 can whole kernel corn
  • 1 bottle sweet coconut gel (nata de coco)
  • 1 bottle sugar palm gel (kaong)
  • a handful of seedless raisins
  • 3 bricks (250 ml each) all purpose cream
  • 2 big cans (300 ml each) condensed milk
  • 1 small can (158 ml) evaporated milk
  • 1/4 cup cheddar cheese, grated
  • 1/4 cup cheddar cheese, finely minced

Procedure:

When you buy your coconut, let the vendor separate the coconut meat from the coconut water. You can also made them cut the coconut meat into strips, meaning less work in the kitchen, hehe! Reserve the coconut water in the fridge until needed or just drink it as it is.

In a very large colander, put the coconut meat, fruit cocktail, kernel corn. Let the liquid drip until it is fully drained, about 15-20 minutes. Reserve the strained liquid in the freezer for future use.

Now, in a smaller colander. Do the same with the sweet coconut gel and sugar palm gel. Disregard the syrup.

In a very large mixing bowl or plastic basin (planggana), that's what I used. I have a collection of colored coded green, small, medium and large sizes of plangganas for food use only in my kitchen. Combine all the ingredients. Mix until well-blended. Place in several containers. Cover tightly and freeze. I like placing my fruit salad in several containers, small to medium sizes, for it wouldn't be hard for us to get and eat it, straight in the container, no need to place it in small plate. This also means less dishes to wash.

I prepared this one day ahead of the traditional celebration of Noche Buena. I like my fruit salad to be frozen, really hard and I want to reduce my work in the kitchen on the 24th (",)

Friday, September 07, 2007

"Breaded Garlicky Pork Fillet" &" Iceberg Lettuce, Red Cabbage and Cucumber Salad with Caesar Salad Dressing"


Last night's dinner.

Ingredients:

Pork fillet:
  • 650 grams pork shoulder (kasim), fillet-cut
  • 1 tsp fine iodized salt
  • 1 tsp ground black pepper
  • 1 tsp granulated garlic
  • 3 tsps savor, garlic flavor
  • 1/3 cup of flour
  • 1 pc egg
  • 2 tbsps of fresh milk or water
  • 100 grams japanese or dried bread crumbs

Salad:
  • 1 small pc (225 grams) cucumber, thinly sliced
  • 1 head (250 grams), iceberg lettuce, torn into small pcs
  • 1/4 head (100 grams) red cabbage, shredded
  • grated cheese for toppings

Dressing:
  • 2/3 cup of mayonnaise
  • 1/2 tsp pickle relish
  • 1/2 mustard
  • 1 tbsp of fresh milk
  • a pinch each of fine salt & white pepper
  • a little sugar


Procedure:

Clean the pork. Pat dry with towel. Place in a large bowl. Throw in the next-four ingredients for the pork fillet. Mash and mix. Let it stand for a few minutes.

While doing so... Combine in a small bowl the dressing for the salad. Cover with plastic wrap. Place inside the refrigerator.

Back to the marinated pork, sprinkle the flour. Toss the pork until well-coated. Let it stand for awhile. In a separate bowl. Beat the egg and milk until frothy. Pour over the floured pork. Mix well. Add 1/3 of the breadcrumbs, toss. Then, the other 1/3 of the breadcrumbs and toss again. Put the rest of the breadcrumbs, toss! By this time the pork should be well-coated.

Deep-fry in batches until rich golden brown. Oil should be very hot. Drain in lots of paper towels.

Tip: Do not overcrowd the pan when deep frying so that the temperature of the oil will not drop quickly making the pork absorbs more oil.

I prepare the salad while I'm frying the pork to save time. Just put the lettuce, cabbage and cucumber in a large platter or bowl. Sprinkle grated cheese on top. Cover with clingwrap. Refrigerate until ready to serve.

Serve with rice or bread.

Tuesday, March 06, 2007

"Salted Egg and Tomato Salad"


What is a Salted Duck Egg?

It is a Chinese preserved food product made by soaking duck eggs in brine or packing each egg in damp salted charcoal. In Asian supermarkets, these eggs are sometimes sold covered in a thick layer of salted charcoal paste. The eggs may also be sold with the salted paste removed, wrapped in plastic, and vacuum packed. From the salt curing process, the salted duck eggs have a briny aroma, a very liquid egg white and a yolk that is bright orange-red in colour, round, and firm in texture.

Salted duck eggs are normally boiled or steamed before being peeled and eaten as a condiment to congee or cooked with other foods as a flavorant. The egg white has a sharp and salty taste. The orange red yolk is rich, fatty, and less salty. The yolk is prized and is used in Chinese mooncakes to symbolize the moon.

Despite its name, salted duck eggs can also be made from chicken eggs though the taste and texture will be somewhat different, and the egg yolk will be less rich.

Salted eggs are also popularly sold in the Philippines. Salted egg sold in the Philippines undergo a similar process of salting as above with few variation in materials used. It is sold over the counter pre-cooked and ready to eat. The commercial salted eggs are duck eggs and always dyed red to differentiate from fresh eggs. As these are also packaged, transported and displayed in markets in egg trays used for fresh eggs.

The most popular method of processing salted eggs in the Philippines is the "Pateros" method. The resulting product tastes succulent, the saltiness delectable and "smooth-to-taste."

Oftentimes, it is sold as fast as the fresh eggs specially in the depressed areas as part of breakfast and in other households, stored as a quick meal for other household members when no prepared meal is available.


"Pateros Style"

The salted egg is prepared by first admixing clay (from ant hills of termites), table salt and water in the ratio of 1:1:2 until the texture of the admixture becomes smooth and forms to a thick cake batter. The fresh eggs are individually dipped and packed in 150 pieces, in newspaper-lined 10x12x18 inch wooden box. The whole bunch lightly wrapped by newspapers to slow down dehydration. These eggs are stored indoors at room temperature over the next 12 to 14 days. That way the salt works its way into the salt uniformly in the batch. Curing can last up to 18 days but that makes very long-lasting red eggs that can last 40 days shelf life but eggs are stocked and replenished every two weeks interval so there is no need for the extra curing time.

After the two week curing, the eggs are hand cleaned with water and brush and prepared to be cooked in low fire in 50 minutes. Time counted from the first boiling of water and the immersion of 50 egg batch. the 50 egg batch is wrapped in fish net for ease of taking out from the cookware. the cookware must be big enough to accommodate the batch with 2 inch of water above the top eggs.

The cooked eggs are then colored red from dye by immersing for a few seconds the newly cooked batch to another container with lukewarm water mixed with the dye and subsequently, the batch is air dried and packed in egg trays.

Chicken eggs may be processed the same way but egg breakage can go up to 10% of the batch.


For the recipe:

Basically, it's a piece of medium sized tomato (the kind that's ripe but still crunchy) and a salted duck egg. I just combined them using my hands, just tore them apart and mix together. That's it! (",)

Well, you just make sure before making this recipe your hands are clean.

Thursday, November 02, 2006

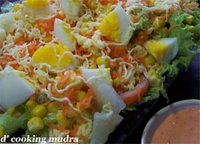
"Easy Green Salad"

For a quick breakfast, I made this ... until now I'm still craving for vegetables .... I mean, luscious green veggies (",).... very yummy!

You'll need:
  • 1 small head iceberg lettuce
  • a bunch of romaine lettuce
  • 1 large plump tomato
  • 1 can (432 grams) whole kernel corn, drain well (reserve corn stock for future use or chill, then drink)
  • 1/4 cup cheese
  • 1 medium carrot
  • 3 pcs hard-boiled eggs, cubed
  • 2/3 cup mayonnaise
  • 1/3 cup catsup
Here's how:
  1. Wash all the veggies. Peel the carrot. Remove the top of tomato, then slice thinly.
  2. Plunge in ice-cold water the iceberg and romaine lettuce. Let it sit for a minute. Drain very well using a colander. Set aside
  3. Meanwhile, in a small bowl, combine the last-two ingredients. Mix well. Cover. Refrigerate.
  4. Back to the green veggies, make sure to wipe off excess water. Tear it into bite-size pieces.
  5. In a large bowl place, put the green veggies, tomato, hard-boiled eggs and corn kernels. Grate on top the carrot and cheese. Mix well. Cover with cling wrap. Chill for a little while.
  6. Top with dressing... toss lightly. Then, munch on it happily c",)
Good for 4-6 servings

Wednesday, August 02, 2006

"Chicken Macaroni Salad"

Looking through my files of recipes and thinking what shall I post for my very first one …. I decided this recipe is the best. It’s one of my family’s favorite, specially my hubby, even my little one who’s very picky with food. He likes it with bread… to be exact with ensaymada.

Also, this dish has a story … a very memorable one. Way back then, almost 15 years ago …. When I made this for the very first time coz someone requested for it although I don’t know how to …. I don’t even liked it then! So, I experimented …. I was just starting to love food then (until now, I still do!!!) ….. I got a little excited and put too much pepper but that someone didn’t mind at all. He just munched on it like it was so yummy! But according to that person it’s delicious though spicy. And that person is…. my husband!!! It was one of the reasons, the love for food, that we became close. We both love to eat.

As the years went by …. I’ve perfected this dish the way my family loves it. I hope you will like it too. Here’s the recipe …..

Ingredients:
  • 350 grams chicken breast
  • 1 pc chicken cube
  • ½ tsp rock salt
  • water
  • 200 grams uncooked, DEL MONTE salad macaroni
  • 1 large (50g) finely minced, native onion/ red onion
  • 50 grams peeled & finely grated, carrot
  • 1/8 tsp fine salt
  • 1/8 tsp ground black pepper
  • ¼ cup grated, EDEN cheddar cheese
  • ¼ cup minced, EDEN cheddar cheese
  • 1 can (439g) of DOLE pineapple tidbits, drained well & reserve syrup
  • 1 tbsp pineapple reserve syrup
  • 1 tbsp LADY’S CHOICE sweet relished pickles
  • 30 grams SUN MAID raisins
  • 5 foil pouches (80ml each)/ 1-2/3 cup LADY’S CHOICE mayonnaise

Here’s how:
  1. In a casserole, combine first-four ingredients. Cover. Bring to boil. Lower fire to low, simmer for 18-20 minutes. Remove chicken. Reserve chicken stock. Drain chicken well. Cut into small chunks. Set aside.

  2. Cook the pasta as directed but instead of using plain water use the chicken stock, add some more water if necessary. Drain the pasta well.

  3. Combine all ingredients in large bowl. Mix well. Place in plastic containers or small cups for individual servings. Cover. Refrigerate.

  4. Serve cold. Use as side dish or appetizer.

Note:

Make this dish a day or 2-3 days before its going to be eaten. To blend in the different flavors well. It is much tastier, creamier and delicious.